
The campus now supports the LTI version 1.3 standard, opening the door to connecting external tools and using them inside the classroom as one more resource. It’s a new feature that’s especially interesting for anyone already working with assessment platforms, simulators, digital libraries, or video conferencing tools who wants them to coexist with the campus without forcing participants to jump from one system to another.
🔗 What the LTI standard is
LTI stands for Learning Tools Interoperability: an education-industry standard that defines a “common language” so a learning platform and an external tool can understand each other. In practice, it means a third-party tool can be integrated into the campus securely and displayed inside the classroom, with no custom development for each case. Version 1.3 is the most recent of the standard and adds security improvements over earlier versions.
⚙️ How it integrates into the campus
There’s something important to keep in mind before you start: the external tool doesn’t come included with the campus. Each institution contracts the service directly with the provider of its choice, and it’s that provider who supplies the subscription and connection details needed to link it. Those details—the ones your provider gives you—are what you then fill in on the campus’s LTI Integrations screen.
With that clear, the process has two stages. First, LTI 1.3 tools are set up from the Integrations menu, where you enter the details your provider gave you. Once configured, they become available within the classroom content so administrators and teachers can include them in their units as LTI Resources, just as they would add any other content. That way, the external tool is within participants’ reach without them having to leave the classroom or log in separately.
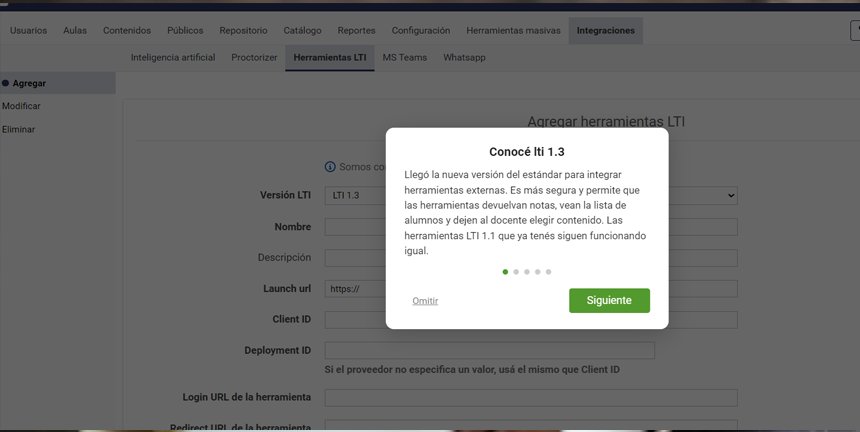
The Integrations › LTI Tools screen, where you enter the connection details supplied by the provider.
🎯 When it’s worth using
LTI integration makes the most sense when you already use—or want to add—a specialized tool that the campus doesn’t offer natively. Some typical scenarios: assessment or practice platforms with automatic grading, simulators and virtual labs, digital repositories or libraries, and video conferencing or collaboration tools. If the tool you have in mind is compatible with LTI 1.3, the integration saves you from maintaining two separate logins and gives teachers and students a more seamless experience.
✅ Best practices before adding an LTI resource
- Start with the subscription. LTI integration connects the campus with a tool you contract separately. Before configuring anything, choose the provider, review the terms of service, and make sure you have the subscription and connection details you’ll enter on the LTI Integrations screen on hand.
- Confirm LTI 1.3 compatibility. Not all tools support this version. Check the provider’s documentation before you begin the setup.
- Test the integration in a trial classroom. Before enabling it for participants, verify that the tool loads correctly and that access works the way you expect.
- Let teachers know the resource is available. Once the integration is set up, tell them they can add it to their units as an LTI Resource and what it’s for. What isn’t communicated doesn’t get used.
- Protect data and access. Keep in mind what information is shared with the external tool, and check that the provider’s terms are compatible with your institution’s policies.
If you want to start integrating external tools, the Integrations menu is your starting point. As always, your feedback helps us keep improving the platform. ✨